Showing posts with label family. Show all posts

Tuesday, November 27, 2012

Daring Bakers--Twelve Days of Cookies!

Good morning, everyone!!
Its time for another Daring Bakers challenge!!! This month we were challenged by Peta of Peta Eats to bake some yummy cookies! One of the recipes needed to be from the 12 recipes suggested by Peta, and the other could be a family favorite or just any other cookie, bar, or candy.

For the first part of the challenge, I chose to bake coconut chocolate cookies!!! Originally, the cookies were supposed to be like little drums, but due to our different flour, my first batch spread out like regular cookies, so we baked the second batch in mini muffin tins. Not as cute as the original, but still yummy!

Recipe (taken from Baking Glory)

Ingredients
    Coconut Filling
  • 6oz / 175ml Cream Cheese, softened
  • ¾ cup Sugar
  • 1 Egg Yolk (the only thing that I changed was to omit the yolk, and the filling still came out great!)
  • 1 ½ tsp Vanilla Extract
  • 2 ¼ cup Coconut Flakes, unsweetened
  • Cookie Dough
  • 1 ¾ cup All Purpose Flour (I ended up using about 2 1/4 cups and my dough still wasn't stiff enough)
  • ⅓ cup Cocoa Powder, sifted
  • ½ tsp Baking Soda
  • ¼ tsp Salt
  • 1 ½ sticks Butter, unsalted
  • 1 cup Sugar
  • 1 Egg
Preparation Instructions
Beat the cream cheese with the ¾ cup of sugar until light and fluffy. Add the egg yolk, and vanilla extract and continue mixing for another minute.
Add the shredded coconut and continue beating until everything is well incorporated.
Preheat oven to 375° F / 190° C.
In a medium size bowl, mix together the flour, cocoa powder, salt and baking soda. In the bowl of a mixer add the butter and sugar and beat together until light and fluffy, add the egg and beat until smooth.
Add the flour mixture to the butter mixture and mix until the mixture is stiff but still pliable.
Using a tablespoon, scoop some of the cookie dough into your hand. Flatten the dough into a circle that’s about 2in to 3in (5cm to 7.5cm) in diameter, add about a teaspoon of the coconut mixture into the middle of it and then fold the sides of the dough but do not seal it at the top.
Repeat this with remaining cookie dough.
Place the cookies on a greased cookie sheet and bake the cookies at 375° F / 190° C for about 18 to 20 minutes
Cool on a wire rack.


All in all, these coconut cookie s were fabulous and we all really enjoyed them!!!

Next up, I made two versions of pb cookies. My dad's birthday was this month, and he requested peanut butter!! The first recipe that I made was a traditional peanut butter cookie recipe, and the next, was a peanut butter cookie with peanut brittle that I found here. And here are the recipes:

Peanut Butter Cookies w/ Peanut Brittle (I halved the recipe and got 8 cookies)

Ingredients:
Brittle: 

  • 1/2 cup sugar
  • 1/4 cup chopped peanuts
Cookies:
  • 6 T room temp butter
  • 3/4 cup sugar
  • 1 T corn syrup
  • 1/2 cup peanut butter
  • 1 egg
  • 1/2 cup + 3 tablespoons flour
  • 1/4 teaspoon baking powder
  • 1/16 teaspoon baking soda
  • 1 teaspoon salt
  • 1/2 recipe peanut brittle
Directions:
  1. First make the brittle but pouring the sugar into a heavy bottomed saucepan and melting over medium heat, being careful not to stir too much in the beginning so that the sugar doesn't crystallize. Once it is more melted, start to stir so that it doesn't burn. Cook until deep amber, about 3 minutes. Once melted, remove from heat and stir in nuts, immediately pour onto a well-greased baking sheet. It will start to set really quickly so try to get it as thin as possible. 
  2. Then, start on your batter by creaming the butter, sugar and corn syrup together for  2 minutes. Scrape the sides of the bowl and beat in the peanut butter, then the egg and beat for 30 seconds on high. Scrape down the sides of the bowl and beat on medium-high for 3 minutes. During this time, your batter should double. 
  3. Reduce mixer speed to low and slowly add flour, baking powder, baking soda and salt. Mix no longer than 1 minute just until dough comes together. 
  4. Crush half of your brittle by putting it in a ziploc and rolling with a rolling pin. Then add to your cookie dough, mix on low for 30 seconds. 
  5. Using a a1/3 cup measure (I didn't fill mine up all of the way), portion out dough onto a parchment-lined cookie sheet at least 4 inches apart and refrigerate for at least an hour. 
  6. Preheat oven to 375 and bake for 16-18 minutes. They should still be soft in the middle. 
These tasted best on the second day because the texture of the brittle really came through by then!!! These were probably everyone's favorite of the three that I made and were really, really delicious!!! 


Finally, the traditional peanut butter cookies were delicious too!!!! I just used a recipe that was in our family Better Homes & Gardens cookbook....basic cookies, so I'm not going to share here but I really , really enjoyed this challenge and making two cookies that were so unique and different!!!


Can't wait til next month!

Wednesday, October 24, 2012

Carrot Cake Cookie Sandwiches

Ok, I realize that it has now been two months since I last posted.......and I said that I was planning on getting back to posting regularly. I'm sorry. A lot has been going on, and I really didn't know in what direction I wanted to take this blog. I actually am still not 100% sure, but I do know that I have been having fun not just following recipes, but creating them and coming up with different flavor combos and testing them out. So, one thing that I know for certain is that I want to share some of my recipe "wins" with all of you invisible internet people out there. :D I'm really getting comfortable with cooking, and it is something that I love.

I probably will also include fitness-related posts here....that is one of my passions. I am planning on going into college next year as a pre-Physical Therapy major, so fitness and health will obviously be a large part of my academic career as well as my professional life. I want this blog to reflect not who I was two years ago when it began, but who I am today. Yes, I have dealt with an eating disorder and definitely still struggle with negative feelings. But I am also a whole lot happier now, more content with myself, and really able to explore areas that I love, and I want to be able to talk about that.

Now, about the cookies. I don't know if anyone else has already made some like these....I'm probably not the first. But, this recipe I created by myself and am really proud of it. So, without further ado, here's my first completely original (to my knowledge) recipe:

Carrot Cake Cookie Sandwiches (makes 18-20 sandwiches)

Ingredients:
For the cookies:

  • 1/2 cup butter 
  • 1/2 cup light brown sugar
  • 1 egg yolk
  • 1 cup flour
  • 1/2 teaspoon vanilla
  • 1 medium carrot, grated
  • dash of salt
  • 1/2 teaspoon baking powder
  • 1-2 teaspoons cinnamon (or more if you are like me and really, really love cinnamon!) 
For the filling:
  • 1 egg white (I just used the leftover white from the cookies)
  • 7 tablespoons sugar
  • 3 1/2 tablespoons water
  • pinch cream of tartar
  • 1/4 teaspoon vanilla
  • 1/4 teaspoon cinnamon (optional....but really, really yummy!)
Directions:
  1. Preheat oven to 350 F. In a medium bowl, cream together the butter and sugar until light and fluffy. Add in egg yolk, beat until incorporated. 
  2. Gradually stir in flour until a dough forms. Add vanilla, carrot, salt, baking powder and cinnamon, mix until fully combined. 
  3. Drop onto a baking sheet by rounded teaspoonfuls, giving the cookies 1-2 in space. Bake for 12-15 minutes or until the edges of the cookies have browned a little bit and the middles are set. These cookies are on the soft side, so they may not look completely done, but if the edges have browned, they will set up after cooling. 
  4. While cookies are cooling, make filling. Combine the egg white, sugar, water, and cream of tartar in a small bowl and set over a pot of simmering water. Whisk for 3-5 minutes or until the sugar has dissolved. Transfer mixture to the bowl of a stand mixer, add in vanilla and cinnamon, beat on high until stiff peaks form, another 3-5 minutes. 
  5. Spread filling onto half of the cookies, top with the other half. There will be filling left over, but it keeps for a few days in the fridge. Enjoy!!!! 


A funny story about these cookies...when I was asking my family for ideas for what to call the cookies, my dad said: "eye candy". When I asked him how he came up with the name he said that carrots are good for your eyesight, the cookies were sweet, plus they were pretty! Anyway, they were a hit over here, so if anyone tests these out, please let me know what you think!!!

Monday, June 18, 2012

I did it again....

Well...I just completely checked out again, didn't I? Sorry about that!!! I really do promise to get back to a regular posting schedule again soon!!!!

Anyway, some pretty fun stuff happened this past week....so I'll do a little recap!

First of all, I've completely fallen in love with Instagram!!!!! Here are some of my favorite pictures that I've taken:


If any of ya'll have instagram, follow me at healthychocoholic please!!! :D 

Also, we had a friend over Saturday! We made cupcakes together!!!! 
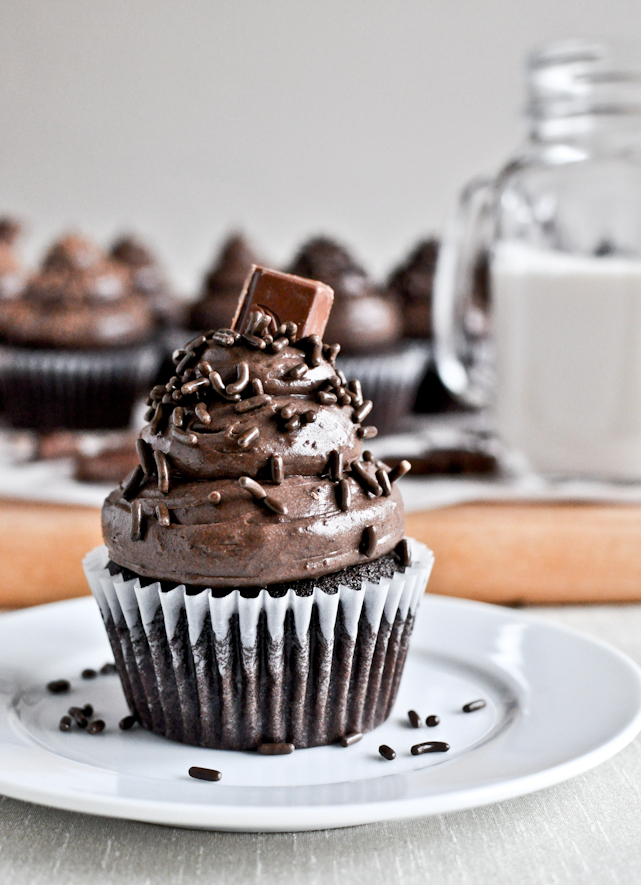
She frosted several of them and put sprinkles on them all!!!!! The cupcakes themselves were a plain yellow cake with some chocolate sprinkles mixed into the batter. We were going to do funfetti, but the store didn't have colorful sprinkles so we just went with chocolate to see what would happen....turned out really well!! The frosting was seriously the best frosting I have ever had.....creamy and delicious w/o being too heavy. Both recipes came from my mom's old Better Homes and Gardens cookbook, so let me know if anyone is interested in the recipes!!!!

Also, yesterday was Father's Day (actually, brazilian father's day is in august) so we made my dad one of his favorite meals: chicken and dumplings!!! I also made a biscuit recipe that I recently tried out for the first time and loved! They are super fluffy and the whole recipe comes together in under 30 minutes!!! Here ya go:

Butter Dip Biscuits
Ingredients:
  • 1/4 cup butter
  • 1 1/4 cups flour
  • 2 teaspoons baking powder
  • 2 teaspoons sugar
  • 1 teaspoon salt
  • 2/3 cup milk
Directions:
  1. Cut butter into chunks and place in the bottom of a small pyrex dish. Place in an oven preheated to 450 for about 5 minutes to melt the butter. 
  2. Meanwhile, whisk together the flour, baking powder, sugar, and salt. Pour in all the milk at once and stir until just combined. Dough will be very sticky. 
  3. Turn dough out onto a lightly floured surface and gently pat out into a rectangle. You may need to sprinkle some more flour on top of the dough in order to work with it, just don't overwork the dough. Separate dough into 12 small chunks (or more if you want bigger biscuits) and roll into balls. Roll each  chunk in the butter and place in the dish. Bake for 15 minutes or until golden. 
These biscuits are seriously so good!!! The dough is super light and fluffy, plus you save time by melting the butter in the dish instead of cutting it into the flour mixture!!!! 

Well, that's pretty much my week in a nutshell!! :D

What have you guys been up to?


Monday, June 11, 2012

Checking In

Morning everyone! I can't believe how long it has been since I last posted! I know that a couple of weeks ago I wrote about wanting to post only when I felt like I had something to actually talk about, and really, this past week, I was focusing on relaxing and hanging out with the family (we had a four day weekend!) and not on writing. Gotta say, it did feel nice to just "check out" for a bit and have fun.

Anyway, I have a couple of things that I do want to talk about today....so here we go!
First of all, over this past week, I have discovered the easiest chocolate dessert ever. It literally takes five minutes. It is called brigadeiro de colher, and is basically chocolate with the consistency of a dulce de leche! So, so good! :D Here's the recipe for ya:

Brigadeiro de Colher
\

Ingredients:
  • 1 can sweetened condensed milk
  • 2 heaping tablespoons sweetened cocoa powder (like for chocolate milk or something)
  • 1/2 tablespoon butter
Directions:
  1. Place all ingredients in a microwave-safe bowl. Stir to combine.
  2. Microwave for two minutes, checking to make sure it doesn't boil over. When time is done, take the bowl out and stir the ingredients for a little while to cool them down. Repeat once.
  3. Microwave for one minute. Remove bowl from microwave, stir again. The mixture should be fairly thick, and it will thicken more as it cools. Eat by itself or with vanilla wafers, fruit, etc!
If anyone tries this out, let me know what you think!!!!!

Now, I do want to talk a bit about something that I haven't brought up in a while....my workouts. I've really changed up my routine and have tried out some new workout styles. I still run and definitely still go to spin class, but I've also been incorporating more bodyrock type workouts.....more intense bodyweight circuit training. In the past couple of weeks, I have done more pushups than I thought I would ever do! :D hahaha I've definitely noticed an increase in strength, which is pretty cool. I'm still trying to find the right balance for me, personally. I noticed last week that I got a little burned out....I ended up taking Thursday off because I was just too tired to work out. So, my exercise routine is a work in progress, but it has definitely changed over the past few weeks. 

Soo, what did you do this weekend?
See ya'll later!


Wednesday, April 25, 2012

A Very Special Day

Morning, everyone!!!!
So yesterday was my mom's birthday!!!!!!!! We hung out, sang happy birthday, and went out for dinner!! It was a good day. I'm sooo thankful for my mom and for everything that she has done and it was really great to get to spend some time with her on her birthday! :D

So a couple of  days ago, I made up a new superset workout while at the gym and ended up really liking it! It was pretty tough and I tried to focus on the legs this time around because usually when I work out I feel like I never actually work my legs very much....typically I focus on arms, abs, back, etc. So, I decided to switch things up a little and loved it! Here ya go:

You'll probably notice that the word "squat" is featured in almost every superset....the hardest were definitely the bulgarian split squats...ouch! 

So yesterday I was alone for part of the afternoon...getting some studying done (finals are coming up). Well, the kitten must have been helping me study or something because after a while, I found her passed out asleep on the couch! She lives such a hard life! 

I don't know why anyone would say that we spoil our cats...do you? hahahaha 

Well, I'm going to get back to studying...see ya'll later!!

What have you been up to this week? 


Monday, April 23, 2012

Apple Braid

Good morning!! How did your weekend go? Ours was nice....extremely quiet but very nice!

Last night, my sister and I decided to bake our version of this apple braid that I had seen a while back. We changed up a couple of things, and for some reason ours didn't stay braided, but everyone really liked it and we're definitely planning on making it again!!! :D Here's what we did:
Apple Braid
Ingredients:
For the apple filling:

  • 3-4 apples (3 medium or 4 small)
  • 4 tablespoons sugar
  • 2 teaspoons cinnamon
  • 2 teaspoons lemon juice
For the bread:
  • 2 1/2 cups flour, plus more for dusting
  • 1/3 cup sugar
  • 1 tablespoon instant yeast
  • 3/4 teaspoon salt
  • 1 cup warm water
  • 2 1/4 teaspoons oil
  • 1/2 teaspoon vanilla extract
For the glaze:
  • 1/3 cup sugar 
  • 3 tablespoons heavy cream
  • 3/4 teaspoon vanilla extract
  • pinch salt
Directions:
For the apples:
  1. Peel and core apples. Cut them into thin slices and then cut the slices in half. Toss with the sugar, cinnamon and lemon juice, place in a buttered dish and bake for 15 minutes at 350. 
For the bread:
  1. While the apples are baking, combine all of the dry ingredients for the bread in a large bowl. Stir in the water, oil and vanilla. Mix until smooth, adding more flour if dough seems too sticky. 
  2. Turn out onto a floured surface, knead a couple of times to make the dough smooth again. Roll out to a rectangle about 12 inches long and 6 inches wide. Transfer dough to a greased baking sheet.
  3. Using a sharp knife, cut strips 1 inch thick along both sides of the rectangle, leaving about 1/3 of the dough in the middle uncut. Spread the apples down the middle section of the dough. 
  4. To braid, fold strips of dough into the center, alternating sides. When you reach the end, pinch seams to seal. Bake at 350 for 25 minutes or until the bread is golden brown. For more information on how to braid the bread, click here.
For the glaze:

  1. While the bread is in the oven, make your glaze, by combining all of the ingredients in a small saucepan. Heat until simmering and cook until it thickens, about 2 minutes. If after 2 min, it still seems thin to you, add more sugar by the tablespoon, while cooking the mixture over low heat until the glaze is the right consistency for you. When the bread is done, brush the glaze over the top and serve! 

So there ya have it....our version of the apple braid!!!!! :D It was sooooo yummy!!!!! The apples tasted like pie filling and the bread was really awesome too!!! The main difference in our version was that we used a little more sugar than in the original, because our apples aren't too sweet and we also really like sweet stuff! :D Also, the glaze was completely different but that's only because I didn't happen to have any confectioner's sugar on hand so I had to make a warm glaze. It turned out nicely, though! 

Well, I'm hoping that my slice of apple braid this morning will fuel me through some school work.....only two more weeks left! whohoo!! What are you up to today????

See ya'll later! 

Monday, April 2, 2012

Good to be Back

Morning everyone!!!!!
How did ya'll's weekends go? Mine was pretty great! Yesterday we visited a new church and had a nice time meeting new people!
So I was a little bit absent from the blog world last week.....just been really busy with school and stuff...plus I actually didn't have any new recipes/workouts to share. Sometimes it helps me to have a little something like  that to get me going on a post and then I just sort of go off on tangents from there. :D
Anyway, I do happen to have a recipe for ya today...the world's easiest cake! It is plain though, so you can either frost it and serve as a dessert, or do what I did and leave it plain and serve with jelly, honey, butter, etc for breakfast! Anyway, I do want to warn you that the texture of this is not a traditional "cake" as it is actually a brazilian recipe and I got my basic recipe from here. Because of the condensed milk in the cake, it is almost like a flan consistency but with flour, if that makes any sense at all. Also, the batter is very thin.....I was pretty worried when I first put it in the oven, but it does bake nicely!

Condensed Milk Cake
Ingredients:

  • 1 can (14 oz) sweetened condensed milk
  • 2/3 cup + 3 T flour
  • 1/2 tablespoon baking powder
  • 1/2 teaspoon vanilla extract
  • 4 eggs 
  • 3 1/2 tablespoons butter, melted
Directions:
  1. Preheat your oven to 350. Butter a 9x9 baking pan, set aside. 
  2. In a large bowl, combine all the ingredients. Beat very well until there are no lumps in the batter and everything has been incorporated. 
  3. Pour batter (once it again, it should be runny!) into the prepared pan. Bake for 22-28 minutes or until the cake tests done with a toothpick. 
  4. Remove from oven, let cool. Top with powdered sugar, frosting, more condensed milk, jelly, butter, etc! :D 
This was a seriously easy cake to make! Like I said before, the texture is a little bit different, so for that reason I don't think I'll make this all the time, but for a treat every once in a while, it is nice! I even made a lemon curd this morning to go along with it (I woke up at 5:30 today for no reason and I bake when bored). It was actually my first time having lemon curd, and I loved it!!!! I'm already thinking about the other citrus flavors I could use in the recipe! :D 

Easter is less than a week away. It is such an important time of the year. Not only is it a time to spend with friends and family, for Christians, it is also a time to remember Christ's death for us and His resurrection .  
It is a special time, and  I am definitely looking forward to having some quiet family time later on this week. Do you have any Easter plans? 

Well, that's about  it for today......

What are you up to this week? 

Monday, March 19, 2012

Recipe Inspiration

Good morning! Hope you all had a great weekend!! We didn't do a whole lot, but still had a good time! What were you up to this weekend?


Sooo today i wanted to share with ya'll a recipe that
my mom and I made yesterday. My grandmother's chicken and dumplings (or dumplin's, as written in the family cookbook :D)!

That's the only recent-ish picture that I could find....she doesn't really looove cameras. :D 

Anyway, my grandmother has been making chicken and dumplings forever and they're pretty much one of my all time favorite comfort foods! When I was little, almost every time we went to her house, she'd have a big pot of dumplings, some biscuits, and some other stuff and we'd all fill our plates up and sit down at the table (which is actually in the kitchen at her house) and go to town. When I was really struggling with my eating disorder, sadly enough, this was one of the dishes that I had the most trouble eating while we were in the States. So, when my mom and I made it for the first time a couple of weeks ago, I was so proud that I could enjoy the food again! When we make it, everything is from scratch....even the broth, but if you don't have a whole lot of time, you can use store-bought and just add some shredded, cooked chicken to it. Here's the recipe for ya'll:

Homemade Chicken and Dumplings
(not my picture..:D)
Ingredients:
  • 8 cups chicken broth (more or less)
  • 1 whole chicken or 4 to 6 breasts plus 4 thighs
  • 2 3/4 cups flour (plus additional flour for kneading)
  • 4 tablespoons oil
  • 1 cup ice water
  • salt, pepper and poultry seasoning to taste
Directions:
  1. Boil the chicken in water seasoned with the salt, pepper and poultry seasoning for 1 1/2 to 2 hours (or until chicken is very tender). Remove chicken from pot, cut into pieces or shred,  set aside. Save broth for boiling dumplings. 
  2. Mix flour, oil and ice water in a large bowl, and work dough just until everything is incorporated. Take about half of the dough and roll out on a floured surface to "pretty thin" (my grandmother's words). Cut the dough into strips, and drop small chunks of strips into boiling broth. Repeat with the other half of the dough, stirring with a fork every once in a while to prevent sticking. Cook 35-40 minutes, stirring every so often, until the dumplings are tender. Turn stove to low heat and then off. Add diced or shredded chicken. 
And there ya have it....my grandomma's chicken and dumpling recipe!!! We had ours last night with some pasta.....it absorbed all the extra broth from the dumplings, almost as if the broth were a sauce, and was really tasty! Also, these are best when served with some sweet tea! hahahaha

What's a meal that is a sort of comfort food to you??? For me, chicken and dumplings and potato soup are some of my favorite comfort foods! :D Oh and anything chocolate as well. hahaha

Well, I should get studying...see ya'll later!

Monday, March 12, 2012

Chocolate Chip Cream Muffins

Good morning! How is everyone today????

I have never really liked Mondays very much......I mean who wants to go back to school/work after a nice, relaxing weekend? I know I don't! That's one of the reasons that I like to bake on Mondays......having something special for breakfast just puts me in a much better mood!
Something special like these muffins. Now I'm pretty sure that everyone who has ever had a muffin has either seen or eaten a chocolate chip muffin. Nothing new in that respect. However, I made these using my new favorite muffin base that I first tried out a couple of months ago with some mango cream muffins (recipe on the recipe page!). Before that, I had never baked muffins with cream in them......scones, yes, but not anything else. So, when I had some chocolate chips to use up, I decided to "wing it" and see if the cream base worked well with other muffin flavors. It did. :D

Chocolate Chip Cream Muffins
Ingredients:
  • 1 3/4 cups flour
  • 2 teaspoons baking powder
  • 1/2 teaspoon salt
  • 3/4 cup sugar
  • 8 tablespoons butter, melted or oil
  • 1/2 cup cream
  • 2 eggs
  • 1 teaspoon vanilla
  • about 1/2 to 3/4 cup chocolate chips....I just finished up a bag that we had opened already
Directions:
  1. Preheat your oven to 400 and grease 10 muffin tins.In a large bowl, combine flour, baking powder and salt. Set aside. 
  2. In another bowl, combine sugar, butter or oil, cream, eggs and vanilla. Stir until everything is combined. Add liquid ingredients to dry, mixing just until combined. Gently stir in the chocolate chips until they are more or less evenly distributed. 
  3. Spoon some of the batter into each of the tins, you will fill them about 2/3 of the way full. Bake for 20 minutes or until the muffins test done with a toothpick. 
  4. Serve with a glaze, butter or plain. Enjoy!!
As soon as my mom took a bite of these muffins she said that I had found one of the best muffin bases that she had ever had! So I'm thinking that I'll hold on to it! :D I've definitely got some more creative ideas floating around, but I wanted to see if the base would work with other ingredients before I got too crazy. 

So, in other news, my dad got home safely at about 1 AM Sunday morning. He was very tired but said that overall, he had a good trip. We were all glad that he was home......after having been gone for the better part of two weeks, it was really nice to spend all of yesterday hanging out! 

Recently, we got a box from some friends in the mail! Among other things, it had some movies in it! My mom, sister and I watched them all on Friday and Saturday, and last night, we rewatched one of them with my dad! We got The Help, Dolphin Tale and Midnight in Paris. I'm pretty sure that of the three, although we enjoyed them all, The Help and Dolphin Tale were our favorites. Both sad and sweet. We watched The Help with my dad last night and he enjoyed it as well. We're also already planning on watching the others with him soon!!!! Have you seen any good movies recently? If so, what were they? I loved the Help so much, that I've now got the book on my ereader!!! :D Already almost done, too!!!! I really think that they did a good job in adapting the book to the screenplay!!!! 

Well, that's about it for today....be back later on this week with some more fun stuff!! :D

Edited to add:
Musings of a Healthy Chocoholic just got a Twitter!!! Check it out: https://twitter.com/#!/GenniferDeLille


How was your weekend? 

Wednesday, March 7, 2012

Easy, Yummy Onion Rings

Good morning!! Hope everyone is doing well so far this week! My dad went out of town again yesterday, so now its just me, my mom, my sister and the cats here at home!  We'll all definitely miss dad, but we do have some girly stuff planned for the rest of the week!!! For instance, yesterday my Mom and I went up with some friends to the community and spent part of the afternoon hanging out with the ladies! So much fun! Then, for dinner, we had homemade pizzas and onion rings!!! I actually just perfected my onion ring recipe, so I thought I'd share it with ya'll:

Easy, Yummy Onion Rings (serves 3-4)
Ingredients:

  • 1 large onion, sliced into rings
  • 3/4 cup flour
  • 1/2 teaspoon baking powder
  • 1/2 teaspoon salt
  • dash of pepper
  • 1/4 teaspoon chili powder
  • dash seasoning salt
  • any other seasoning that you like, to taste! :D
  • 1 egg
  • 1/2 cup buttermilk
  • Oil, for frying
Directions:
  1. Slice your onion and place in water while you prep everything else. 
  2. In a medium container with a lid, combine your flour and seasonings. In a separate bowl, combine the egg and buttermilk. 
  3. Working with a few onion rings at a time, dip into buttermilk mixture, and then place in the flour. Close the container and shake it to coat the onion rings with the flour mixture. Then, dip back into buttermilk mixture and coat with flour again. 
  4. Repeat this process with all of the onion rings, placing the finished ones on a plate as you are going. 
  5. Heat about 1 inch of oil in a deep skillet until it is hot enough to start frying the onion rings as soon as they are placed in the skillet. Working in small batches, fry the onion rings for about 1-2 minutes each side or until golden brown. 
There ya have it!!! I really liked having the flour in a container with a lid because that way there was a whole lot less mess and it made the process go by faster as well!!! A cool thing about onion rings is that they aren't quite as greasy as french fries, for example, because the batter really soaks up excess oil very well. Also, we like our onion rings pretty well seasoned, so if you want to take anything out or even add in some different seasonings, tell me how it works out!!

So tonight is going to be a lot of fun!!!! There's a movie rental place just up the street from us and today is "cheap day", where movies cost about 2-3 reais each!!!! We're going to rent some chick flick and have a girl's night!! Any good chick flick recommendations??? We've seen a lot of movies, but it has been a while since we watched a real chick flick, so I'm excited!


Speaking of girl's night, if that's gonna happen, I need to get on the schoolwork! See ya later!!! :D

Favorite fried food????
Ummm french fries, onion rings, fried dill pickles, heck doughnuts.....basically fry anything and I'll eat it! :D

Friday, February 17, 2012

Happy Friday! :D

Yet another bad post title......I really need to work on my creativity. hahahaha

Anyway, Happy Friday, everyone! I'm so glad that today is Friday! This next week, a lot of brazilians will be celebrating Carnaval, which is basically my least favorite holiday ever. The people here go absolutely crazy! Anyway, we pretty much stay holed up in the apartment, so we are looking at 6 or so days of non stop family time! hahahaha
So Wednesday, I got a great new workout in and thought I'd share it with ya:

So, as you can see, this workout is pretty leg-heavy. Most of the exercises themselves are fairly simple, but the combination of the two exercises in each superset and doing each one 3 times through before a rest is killer!!! Also, if you want, you can definitely modify this by reducing or increasing reps, adding some cardio in there, etc! If anyone tries this out, let me know what you think!!!!

So today, I wanted to do something a little different than my typical posts, inspired by a lot of the blogs that I read. I'm going to post some of my favorite links from this past week. Interesting articles, yummy-looking recipes, tough workouts, etc. I'm hoping that by posting this stuff I'll actually remember to revisit the sites and actually try out the recipes/workouts/etc. Anyway, here's my first edition of Friday Favorite Links:


Um yum! Apparently this ends up with three layers....a crisp top, pudding-like middle and on the bottom, actual hot chocolate! Plus, there's only 4 ingredients!!!!!


  • Not an actual link....I just thought this was cute! :D 


  • A new circuit that I saw on  pinterest!


  • And finally another pinterest find that I really liked!


Aaad that's it for my first ever Friday Favorite Links! What did you think? 

Well, I should probably get going.....school and all that! What are your weekend plans?  I'm pretty sure that we're going to rent a bunch of movies and hibernate for the next few days! Also, which of these two recipes do you want to see first:
  • Mini Protein Muffins (the "healthy" option)
  • Super Easy Basic Banana Bread (a family favorite recipe!)
Oh and before I go, I just want to say something really quickly! I'm really, really excited about today because my mom is going to spin class with me!!!!! She's never been before, and I got the free pass for her on Monday, so I've been looking forward to this all week!!! :D

Now, I really am going....see ya'll later!

Friday, December 16, 2011

Christmas Decorations=DONE!

Heey!!!! I can't believe that it is already Friday! This week has pretty much flown by! I do have one more Challenge Exam left, but I'm not taking it until next week because of the process that it is to receive my exam.
Only a year and a half left to go in high school!!! Whohoo! :D

So last night, my mom, sister and I were at home and we decided to (finally) get our Christmas decorations up. We've been meaning to do so for a little while now, but something always seemed to come up! It was really fun to take everything out of the box and decorate! We've put up our tree, stockings, nativity scene, and other various decorations. A funny story about our nativity scene: Something that kind of bothers my dad about the Christmas story that is told most often is that the three wise men couldn't actually have been there when Jesus was born....they arrived about two years later due to their journey. So whenever we set up our nativity scene, we put the wise men on another table across the room to represent the fact that they were on their way to Bethlehem. Is there anything that your family does differently than most on Christmas? Besides the whole nativity scene thing, we also have a pickle ornament that our parents hide in the tree on Christmas morning. Whoever finds it first gets a special prize (usually something small in our family!). My sister found it last time so I am determined to find it this year! :D

There's our little Christmas tree!! You can't tell in the picture, but it is pretty wobbly so we had to tie it to those bars on the window with some thread to make it stay! :D

Well that's about it for today....

What are ya'll doing this weekend??

Monday, November 21, 2011

Awesome Weekend and Oatmeal Cream Pies

Hey everyone!!!! How was your weekend??? Ours was great!!! It felt like it went by a little bit too fast, though and no one was really happy about today being Monday...:P

Saturday we went up into the community for the ladies' afternoon. It was so much fun!!! There was a devotional time in the beginning, and then we took a picture of each of the ladies and let them make their own "picture frames" so that they could have a nice picture at home. Then we came home and pretty much just hung out.

Yesterday was my dad's birthday!!!! We started out the day with egg and cheese sandwiches and blueberry muffins (his favorites), and really just spent the rest of the day around the house, which is what he wanted to do.
To surprise him, my sister and I made him some homemade oatmeal cream pies, from this recipe. They were soooo yummy!!!!! Whenever we're in the States, Dad always gets cream pies, so when we saw this recipe, we immediately thought of him! :D I'll type out the recipe here for ya'll!!!

Oatmeal Cream Pies


Ingredients:

  • 1 cup butter
  • 3/4 cup brown sugar
  • 1/2 cup sugar
  • 2 eggs
  • 1 tsp vanilla
  • 1 T honey
  • 1 3/4 cup flour
  • 1 t baking powder
  • 1/8 teaspoon cinnamon
  • 1/2 teaspoon salt
  • 1 1/2 cups oatmeal (quick)
Directions:
  1. Cream together butter, brown sugar and sugar until fluffy. Add eggs, vanilla and honey and beat until everything is incorporated. 
  2. In a separate bowl, whisk together flour, baking powder, cinnamon and salt. Slowly add flour mixture to the wet ingredients until everything is combined. Stir in the oats and mix until they are evenly distributed. Place batter in the refrigerator for 15 minutes. 
  3. Take chilled dough and drop by tablespoon onto baking sheets. Bake for 8-10 minutes at 350. The cookies might look a little undercooked or moist in the middle, but they will set. Transfer cookies to a cooling rack and let cool completely. To make the cream pies, spread some filling on half of the cookies and sandwich them with the plain cookies.
Marshmallow Creme Filling

Ingredients:
  • 2 egg whites
  • 1/2 cup sugar
  • 1/4 tsp cream of tartar
  • 1/2 tsp vanilla
Directions:
  1. In a double boiler, combine egg whites, sugar and cream of tartar. Heat until the egg whites are frothy and the sugar is completely dissolved (about 160 degrees). 
  2. Transfer egg white mixture to the small bowl of a mixer, and beat until stiff peaks form. Fold in the vanilla extract. 
This did make a little more marshmallow creme than we needed, but we just put the leftover in the fridge to use with other things!!! :D 

What did you do this weekend?

Well, I should probably start on school...see ya'll later! :D 


Monday, October 31, 2011

Fun Weekend and Happy Halloween!

Hey everyone!!!! How was your weekend?? Mine was really awesome!!! We had some great family time, ate a lot of REALLY awesome food and just relaxed a little bit!! The past couple of weekends have been fun, but pretty busy, so we made a point of kicking back a little bit this weekend. Saturday we went to this awesome restaurant where there was all-you-can eat salad and seafood, different cuts of steak were brought straight off of the grill to our table, and we could special order certain cuts of meat, chicken or fish filets. It was sooo yummy!!! I definitely filled up on the salad and seafood buffet, and special ordered some fish!!! I loove seafood, and so does my dad, but we don't eat it very often, so we both definitely took advantage of all the seafood!!! :D So yummy!!!! The steak was good, too! Pretty sure everyone was stuffed after we left the restaurant!
Brazilian specialty: Picanha
So, besides that, we basically hung out and watched some movies!!! What did you do this weekend????

Now, I want to say: HAPPY HALLOWEEN! :D 
Anyone have any plans for today??? I don't think that we do.....Halloween isn't really a huuuge deal here. 

Anyway, I have a perfect fall/halloween recipe to share with ya'll!!! Caramel apple muffins! 

Caramel Apple Muffins

Ingredients:
  • 3 medium apples, peeled, cored and diced
  • 1 T butter
  • 1 T granulated sugar
  • 1 cup flour
  • 1 teaspoon baking powder
  • 1/4 teaspoon salt
  • 1/2 cup butter
  • 2/3 cup brown sugar
  • 2 eggs
  • 2 T buttermilk
  • 1/2 t vanilla extract
Directions:
  1. Place the diced apples, the 1 T butter and the 1 T sugar in a skillet and saute until golden and caramelized, about 5 minutes. 
  2. Combine the flour, baking powder and salt in a small bowl and set aside. 
  3. Combine the butter and sugar and mix until creamy. 
  4. Add in each egg one at a time, stirring after each one until fully incorporated.
  5. Stir in the buttermilk and the vanilla extract, mix until all the wet ingredients are combined. Add the dry ingredients to the wet. 
  6. Once everything is mixed in, stir in the caramelized apples, mixing only until they are well distributed. 
  7. Spoon batter into 10-12 greased muffin tins and bake at 350 for 20-25 minutes or until a toothpick comes out clean. 
  8. Serve with butter or with a powdered sugar glaze. 
These were seriously so, so awesome!!! I haven't gotten any pics yet, but when I do, I'll be sure to share them with ya'll!!!! Do you have any go-to Halloween or fall recipes? If so, share!! :D 

Well, that's about it for today!!! See ya'll again soon! :D 


Friday, September 23, 2011

Happy 1/2 Birthday to my Sister! :D

Anyone else glad that its Friday? I feel like this week has just flown by! My poor sister has been stuck doing tests all week long. Brazilian schools are like that....they schedule a "test week" instead of the teachers choosing the test days. You only really have 1 or 2 tests per class each quarter, and they're a major part of your grade. While its nice to know that after the week is over, you won't have to worry about tests for a while, the whole process can definitely get exhausting!

So anyway, since last year we have celebrated half birthdays. The story behind that is that my sister never gets to celebrate her actual birthday in the US....we always go on furlough during the second half of the year. So I came up with the idea to take her out to eat and celebrate her half birthday! I actually kept the whole thing a secret and she never suspected anything! Of course, by the time we actually got to the restaurant, I was about to spontaneously combust from keeping the secret for an extended period of time, but we had fun! Then, in June, she planned a surprise dinner for my half birthday. So now, its a tradition. Can't say what I'm making for her yet, because I don't want to spoil the surprise, but I'm really excited! Do ya'll celebrate half birthdays?


In other news, I just caught my kitten playing with a plastic bag....it was pretty funny! Here's a pic:

Aaand I'm glad to say that I'm finally figuring out how to edit and upload videos, so here's one of the cat playing.. Please excuse the crappy quality...it was taken with my camera. Hopefully though, the fact that I'm learning the whole video thing means that I'll actually get that vlog that I've been talking about up! 


Well, that's about it for now......see ya'll later! :D 
What are your weekend plans?

Do you have any questions or anything that you would like me to talk about on a future vlog?


Monday, September 12, 2011

Fun Weekend and Yummy Treats

Morning, everyone!!! Hope you all had wonderful weekends!!!! Mine was great! Saturday was really busy because we had an event for the ladies of the community. We watched a movie, Fireproof, and then gave each a plant to take care of this month and to bring back next month to actually plant at the church. Then, Saturday night, there was a youth service at the same church in the community, which we went to as well!!!!! Yesterday, I actually think that I only left the house to go and rent another movie, Unknown. The entire rest of the time, I hung out at home, which was fun, too!!! I finally made that chocolate cobbler that I've been wanting to for like a year now.....its pretty incredible! I don't have any pics, but here's one of Jessica's:

(Photo courtesy of How Sweet It Is)

Seriously, if you like chocolate, make this now! The sauce part thickens as the cobbler cools, and becomes almost pudding-like!!! I will admit though, that it was probably one of the weirdest things that I've actually put together pre-oven time. I definitely had to resist a strong desire to stir the hot water in to the batter! hahaha

Another thing that I've made this weekend (well, actually this morning, but in my head, still counts as the weekend...:P) is the French Vanilla version of this creamer. It is cooling now....can't wait to try it out!!! If my mom likes it (her favorite creamer is french vanilla), I definitely want to try out the peppermint mocha version (my favorite!)! 

I was really proud of myself this weekend for being more go with the flow in regards to food and stuff! I can definitely remember a time in which randomly whipping up a dessert, without (gasp!) planning it would definitely have not been ok with me. I did just that yesterday, and enjoyed the heck out of it! :D Yay for me! hahahaha Do you have trouble doing anything unplanned or do you enjoy spontaneity? If you couldn't already tell, little OCD me does not do well with changes to a plan, even if it is a plan that exists only in my head about which no one else even knows....I'm definitely working on that!!! :D

Other than having chocolate for breakfast, my day actually looks pretty quiet...mostly just school stuff.....there is this book that I'm reading for my Lit class, Deerslayer, that my teacher called dull and tedious (in parts), so for some reason, I'm not actually too excited to start reading it. Wonder why that is? 

So I feel like I've been sorta wordy today......so I'm gonna leave ya'll with some questions!

Have you ever had a teacher say something that made you lose interest in an assignment?

Um yes. Exhibit A: Deerslayer. hahaha 

Do you prefer weekends where you stay at home or busy weekends?

Well, while I enjoy being at home with the family, I start to go a little bit stir crazy after a couple of hours at home....so, a weekend like this past one, with one busy and one quiet day is pretty much perfect for me! 

That's about it for today!!! See ya'll soon! 

Friday, September 2, 2011

Father Daughter Time

Hey everyone!! Hope your week has been going really well!!!!! Don't forget to enter my very first giveaway, if you haven't yet!!! It'll end tomorrow at midnight, and I'll announce the winner on Monday morning!! :D

So we've been pretty busy this week. First, we've had to deal with our old, big, fat cat getting used to having a small kitten around the house, which has been pretty interesting. Then, I've had a couple of big school projects and tests this week, so I've been sort of studying like crazy. I'm definitely glad that today is Friday!!!!! I really hope that we just relax this weekend!!! Do you have any major weekend plans?? 


This morning, I had some fun with my dad! I got a free pass to the gym a few weeks ago, and today, he came with me!!!!! We spent 30 minutes on treadmills, chatting, and then did about 25 minutes of strength training. I've never worked out with anyone before, so it was really interesting. I originally thought that it would be weird, because I'm typically use my workout time to "zone out" and think about life, but I realized today that having someone to chat with really made it the entire thing go by so fast! While I definitely think that some days I'll want to workout alone, but now that I've had a "workout buddy" I'll definitely want to workout with a friend more often!!!! Also, having someone there with me motivated me to do some strength training (ugh!) which I probably really needed to do!! Do you prefer to workout alone or with a friend?


Well, I should probably go study now....I have a bio test to study for! hahaha See ya'll later!

Monday, August 29, 2011

Our trip + Special News!

Heey!! Hope you all had wonderful weekends!!! Our trip was so much fun, even if we only there for a little over 24 hours! I'm still sort of recovering, so I'll just post a quick summary of our trip in pictures!


Me and My Sister

The Beach! :D

Sunrise

We saw a parrot!

View from the Top of a Hill
As I mentioned Friday, I have some fun news for ya'll!!!! We got another cat!! She's sooo cute! She has a blue eye and a green one! We named her Katsa (after a character in a book who has a blue and a green eye!, and she's the sweetest thing ever! I'll have some pics of her up tomorrow!! Let me just say that a certain fat cat is not pleased with this development! hahaha


When you're at the beach, do you like to just relax of go and sightsee???


I was most definitely born to lay out in the sun all day long. :D