Showing posts with label recipe. Show all posts

Friday, April 12, 2013

Lemon Cake w/ Orange Marshmallow Icing

A week or two ago I saw an awesome looking cake on How Sweet It Is, which by the way is one of my all time favorite food blogs! Anyway, Jessica made a lemon cake that was topped with a marshmallow icing and some coconut. I couldn't get the idea of lemon and marshmallow out of my head, so I thought I'd take her recipe, and switch it up a bit based on what we had here at home.
We really like citrus, so I added just a tiny bit of orange zest to the frosting, and it turned out really well. I also nixed the coconut , because I didn't want there to be too many different flavors going on. Thanks, Jessica for the wonderful inspiration!!!

(Props to my sister for decorating the cake!)
Lemon Cake with Orange Marshmallow Icing
Ingredients:
Cake
  • 2 cups flour
  • 2 teaspoons baking powder
  • 1/2 cup butter, melted and cooled (ours was salted)
  • 2 eggs
  • 1 cup sugar
  • 1 teaspoon vanilla
  • zest of 3 lemons 
  • 1/2 cup fresh lemon juice
  • 3 tablespoons milk 
Icing
  • 4 egg whites
  • 1 cup sugar
  • 1/4 teaspoon cream of tartar
  • 1/2 teaspoon vanilla 
  • orange zest to taste (I zested a whole orange and just added a little bit at a time until the icing tasted the way I wanted it to.)
Directions:
Cake
  1. Preheat oven to 350 and grease a 9 inch pan. 
  2. Stir together flour, baking powder and salt in a medium bowl. 
  3. Whisk together eggs and sugar until combined, then add butter and vanilla. When these are all combined, stir in the zest, juice and milk. Add the dry ingredients slowly, stirring after each addition until everything is just combined. 
  4. Pour into pan and bake for 25-30 minutes or until the cake tests done. 
  5. Let cool completely, frost, and enjoy!
Icing
  1. Combine egg whites, sugar and cream of tartar in a heat-proof bowl. Place on top of a pot that has simmering water, and whisk for about 4 minutes or until the sugar has dissolved. 
  2. Transfer immediately to the bowl of a stand mixer and beat, starting at a slow speed and gradually increasing, until the mixture is glossy and forms stiff peaks. 
  3. Add vanilla and zest, beat until combined!
I hope you all enjoy this cake as much as we have!!!
If you do try this recipe, please let me know what you think!


Wednesday, March 27, 2013

Daring Bakers March 2013--Hidden Veggies

Hi everyone!!!
This month's challenge was really fun!!!
Ruth from Makey-Cakey was our March 2013 challenge host. She encouraged us all to get experimental in the kitchen and sneak some hidden veggies into our baking, with surprising and delicious results!

I  decided that I wanted to base my recipe off of a red velvet cake that I had seen with beets in it. However, when I looked at the recipe, I thought it would be a little on the chocolate-y side, so I figured that I'd just turn it into a fudge cake. I then topped the cake with a not-too-sweet italian meringue buttercream! We even sent a couple of slices over to some friends of ours, and no one guessed that there were beets in the cake!!
(lovely decoration by my sister!)
Anyway, this was a really fun challenge and a really yummy cake!!!

Chocolate Beet Cake
Ingredients:
  • 3/4 cup pureed beets (one large beet was enough for me....I roasted it in the oven for about 30 minutes, in a dish with about 1/3 cup of water, then I just chopped it and blended until smooth)
  • 1/2 cup oil
  • 1/2 tsp vinegar (I used apple cider)
  • 2 eggs
  • 1 cup flour (the original recipe called for 3/4c but I found the batter to be a bit thin)
  • 2/3 cup sugar
  • 2/3 cup cocoa
  • 1 tsp baking powder
  • 1/2 teaspoon baking soda
  • 1/4 teaspoon salt
Instructions:
  1. Preheat oven to 350 degrees and whisk all of the dry ingredients together in a medium sized bowl. 
  2. Stir together all of the wet ingredients and add the dry ingredients about 1/3 at a time, stirring after each addition. 
  3. Pour into a greased 9 in cake pan and bake for 20-24 minutes, or until the cake tests done in the center. Remove and let cool completely before icing. 
Italian Meringue Buttercream
Ingredients
  • 1/2 cup sugar
  • 2 tablespoons water
  • 2 egg whites
  • 1 cup room temperature sugar
  • 1/2 teaspoon vanilla extract
Instructions:
  1. Combine sugar and water in a small saucepan. Bring to a boil, stirring. Once it boils, stop stirring and insert a candy thermometer. 
  2. While syrup is cooking, whip egg whites in the bowl of a stand mixer to soft peaks. When the syrup reaches 238-240 degrees, pour into the egg whites with the mixer on medium speed.
  3. Increase speed to high and beat until room temperature.
  4. Add the butter 1 or 2 tablespoons at a time until it is all incorporated. I used the whole cup, but I think that 3/4 of a cup would work just as well and maybe the icing would hold up a bit better. 
  5. Add vanilla, increase speed and beat until completely smooth. 
  6. Refrigerate the icing while the cake is cooling. 
Again, this was such a fun challenge and I have truly enjoyed being a part of the Daring Bakers!!


Wednesday, February 27, 2013

Daring Bakers----Crackers and Flatbreads!

Good afternoon!!!!

 Sarah from All Our Fingers in the Pie was our February 2013 Daring Bakers’ host and she challenges us to use our creativity in making our own Crisp Flatbreads and Crackers! 

cheese straws(source)


I've been a little absent from the blogging recently....apparently finishing up your senior year of high school requires a bit more concentration than usual. But, when I saw this challenge, I knew that I had to do it!!!! If you're wondering, I made cheese straws!!! I lightly adapted a smitten kitchen recipe and we all really loved how it turned out!!!! I didn't get a chance to take pictures....they were mostly gone before I got to a camera!Then, of course I dropped the remaining cheese straws and broke them! Anyway, we really loved this recipe, and thanks for the great challenge Sarah!

Cheese Straws
(we got about 36 cheese straws!)

Ingredients:

  • 3/4 cup flour (plus some for dusting)
  • 1 2/3 cup freshly grated Cheddar cheese
  • 4 tablespoons room temp butter
  • 1/4 teaspoon salt
  • 2/3 teaspoons red pepper (we like spicy! feel free to use 1/2 tsp or less!)
  • 1 tablespoon milk
Method:
  1. Preheat oven to 350 F
  2. Combine flour, cheese, butter, salt and pepper in a food processor. Pulse until the mixture resembles coarse grains. Add the milk and then pulse until the dough comes together. 
  3. Place dough on a lightly floured surface and roll out into a rectangle about 1/8 in thick. Cut into strips (ours were about 1/8 in thick) and gently transfer to an ungreased baking sheet. 
  4. Bake for 12 minutes or until the edges of the cheese straws begin to brown. Let cool and serve!
Again, these were delicious and we loved trying out a new cracker recipe!!!!

See you soon!

Sunday, November 18, 2012

Two Years

So I just found out that today is my two year blogiversary!!! Wow! I can't believe it!!!!

I've definitely had times where I posted more than others....I've switched from wordpress to blogspot.....joined the daring bakers (!!)...the entire blog has changed and grown so much in the past two years that it is almost as if this weren't even the same blog. I've grown up some, and have learned a lot!

I may not have the biggest and definitely not the best blog ever, but I have loved the experience and "meeting" several people through the blog world!!! To celebrate my two years of blogging, here's a yummy smoothie recipe that I've been working on! I was inspired when I saw a post somewhere a while back on an orange push up smoothie, and adapted it to fit what is available here!!

Creamsicle Smoothie (makes two or three smaller smoothies...or one really huge one!)

Ingredients:

  • 200g frozen citrus juice concentrate (ours comes in little pouches of 100 grams each...I used tangerine, though orange, mango or anything like that would work)
  • 2/3-1 cup milk (depending on the consistency you want your smoothie)
  • 1/3 cup sugar 
  • 1/2 to 1 cup ice
Directions:
  1. Combine your frozen concentrate, milk and sugar in a blender. 
  2. Blend until fairly smooth and the sugar has dissolved.
  3. Add ice and blend until smooth.
  4. Pour into glasses and enjoy!!!! 

Wednesday, November 14, 2012

Microwave Brownie Cake

Heeeey! Long time no see, huh? I've been coming up with some recipes....and didn't want to post until I had at least a couple in the works.....

I'm sure everyone has seen those microwave mug cakes at some point before.....I know I sure have! I actually made a couple a few years back, and while we all liked them, I have been looking for something a little more brownie-like, since I'm actually not the biggest cake person. I tried out a couple basic recipes for mug cakes to see which worked best and tasted best and from those experiments, came up with a pretty decent fudge brownie cake. 

I've made it a couple of times so far and it has turned out well, one thing I will say is that a little bit of baking powder goes a long way...the amount in the recipe below makes a very dense treat, while just adding a little bit more makes it much more cake-like. So it really depends on personal preference. For example, I preferred this version, while some of my family thought that, while tasty, it was almost too dense. 

Fudge Brownie Mug Cake 

Ingredients:
  • 1 tablespoon butter
  • 1/4 cup flour
  • pinch salt
  • 1 heaping teaspoon cocoa powder
  • 1-2 tablespoons sugar (depending on preference)
  • 1/8 teaspoon baking powder
  • 1 egg yolk
  • 1-3 teaspoons milk (or until batter reaches a good consistency)
Directions:
  1. Melt the butter in a mug or ramekin in the microwave.
  2. Stir in the flour, salt, cocoa, sugar, baking powder, and egg yolk. Add milk until the batter reaches a consistency similar to that of a  thick brownie batter or cookie dough.
  3. Place in microwave and cook for 45 seconds. If not done, cook in 5-10 second increments until it is. Top with some melted chocolate and enjoy!!

If anyone tries this out, let me know what you think!!!!


Monday, August 27, 2012

August 2012 Daring Bakers--Filled Pate a Choux

Hey everyone!!!!! So, to begin my blog revamp I am super excited to say that I'm now a part of the Daring Bakers! whoo! There's a new challenge every month, and this month's happened to use pate a choux. If you remember, I have made eclairs before (check the recipe tab!) and enjoyed that, so I was really looking forward to trying something new with pate a choux. 

Kat of The Bobwhites hosted this month's challenge and encouraged everyone to get creative with the shapes and fillings of our choux. She made some cute swans, and here's the link. 

Yesterday, my sister and I made these and everyone loved them!!! We don't really have anything that we could have piped the swans with, so we just used some cookie cutters and made hearts and stars!Also, we had been wanting to try making faux caviar for a while and found a recipe here that didn't require any special ingredients, so we incorporated some chocolate "caviar" into the mix as well. Here's the recipe:

Cappuccino Cream-Filled Eclairs with Chocolate Ganache and Chocolate "Caviar"

For the cappuccino creme patissiere:
  • 1 cup milk
  • 2 tablespoons cornstarch
  • 6 tablespoons sugar
  • 1 egg
  • 2 egg yolks
  • 2 tablespoons butter
  • 1 teaspoon vanilla
  • 1 1/2 teaspoons very hot water
  • 1 1/2 teaspoons instant cappuccino mix
  1. In a bowl, combine 1/4 cup of milk and the cornstarch, stirring until smooth.
  2. Heat the rest of the milk in a saucepan until boiling. Remove from heat.
  3. Stir first the whole egg, and then the yolks, into the milk/cornstarch mixture. Add about 1/3 of the hot milk to that gradually, whisking the entire time. 
  4. Put the saucepan back on the stove over low heat. Pour in the tempered egg mixture in a stream, whisking constantly. Continue whisking until cream thickens and boils, to avoid lumps. 
  5. Stir in the butter and vanilla.
  6. Combine the water and cappuccino mix, stir into the cream. 
  7. Pour cream into a bowl, cover with plastic wrap, making sure that the wrap touches the surface of the cream. Refrigerate. 

For the choux:
  • 1 cup water
  • 1/2 cup butter
  • 1/4 teaspoon salt
  • 1 cup flour
  • 4 eggs
  1. In a medium sized saucepan, combine water, butter and salt. Bring to a rolling boil, remove from heat. Dump in all of the flour at once and stir until it forms a smooth paste. Cook a little bit longer until the flour pulls from the edges of the pot. 
  2. Dump dough into a bowl, work for a few minutes until it is cool enough to touch. 
  3. Add eggs one at a time, beating a little bit after each addition. Beat until a smooth, thick paste forms. 
  4. Preheat oven to 375, grease or line baking sheets. Spoon or pipe out paste into desired shapes, making sure to smooth down any edges before baking.
  5. Bake until golden and puffy. 
  6. Remove from baking sheets, let cool completely before filling. 

For the ganache:
  • 1 cup heavy cream
  • 12 tablespoons cocoa powder
  • 14 tablespoons sugar
  • 6 tablespoons oil
  1. Combine all ingredients in a small saucepan.
  2. Heat until everything is combined. Pour into a container. 
For the chocolate "caviar":
  • 2-3 cups oil (refrigerated overnight)
  • 1/4 cup salt
  • 3 oz hot chocolate (we made ours with milk and the ganache above) 
  • 2 packs unflavored gelatin
  • 3 tablespoons water
  1. Combine the water and gelatin, stirring until there are no clumps of gelatin. Let sit while you prepare the hot chocolate.
  2. Fill a large bowl with ice, add water till about 2/3 full. Stir in the salt. Pour the cold oil into another bowl, set inside the ice bath. 
  3. Pour the hot chocolate into the gelatin mixture, stir until the gelatin melts. With a dropper, drop 2-3 drops of chocolate mixture into the cold oil to make a "caviar". Keep dropping the chocolate into the oil until the bowl is full. Let sit about 3-5 minutes, remove with a strainer and set finished caviar in another bowl. Repeat this process as many times as you can before your gelatin mixture gets too thick. 
For assembly:
  1. Once pastries are cool, poke holes in each one that are large enough to pipe the cream into. Fill a pastry bag with some of the creme patisserie, and pipe it into each eclair until it is full but not stuffed. 
  2. Once all eclairs are filled, drizzle some of the ganache on top, and then sprinkle with the "caviar".
  3. Enjoy! :D

So there ya have it, our take on a "fun" filled choux! If anyone tries this, please let me know what you think!!!!

See ya later!


Monday, June 18, 2012

I did it again....

Well...I just completely checked out again, didn't I? Sorry about that!!! I really do promise to get back to a regular posting schedule again soon!!!!

Anyway, some pretty fun stuff happened this past week....so I'll do a little recap!

First of all, I've completely fallen in love with Instagram!!!!! Here are some of my favorite pictures that I've taken:


If any of ya'll have instagram, follow me at healthychocoholic please!!! :D 

Also, we had a friend over Saturday! We made cupcakes together!!!! 
She frosted several of them and put sprinkles on them all!!!!! The cupcakes themselves were a plain yellow cake with some chocolate sprinkles mixed into the batter. We were going to do funfetti, but the store didn't have colorful sprinkles so we just went with chocolate to see what would happen....turned out really well!! The frosting was seriously the best frosting I have ever had.....creamy and delicious w/o being too heavy. Both recipes came from my mom's old Better Homes and Gardens cookbook, so let me know if anyone is interested in the recipes!!!!

Also, yesterday was Father's Day (actually, brazilian father's day is in august) so we made my dad one of his favorite meals: chicken and dumplings!!! I also made a biscuit recipe that I recently tried out for the first time and loved! They are super fluffy and the whole recipe comes together in under 30 minutes!!! Here ya go:

Butter Dip Biscuits
Ingredients:
  • 1/4 cup butter
  • 1 1/4 cups flour
  • 2 teaspoons baking powder
  • 2 teaspoons sugar
  • 1 teaspoon salt
  • 2/3 cup milk
Directions:
  1. Cut butter into chunks and place in the bottom of a small pyrex dish. Place in an oven preheated to 450 for about 5 minutes to melt the butter. 
  2. Meanwhile, whisk together the flour, baking powder, sugar, and salt. Pour in all the milk at once and stir until just combined. Dough will be very sticky. 
  3. Turn dough out onto a lightly floured surface and gently pat out into a rectangle. You may need to sprinkle some more flour on top of the dough in order to work with it, just don't overwork the dough. Separate dough into 12 small chunks (or more if you want bigger biscuits) and roll into balls. Roll each  chunk in the butter and place in the dish. Bake for 15 minutes or until golden. 
These biscuits are seriously so good!!! The dough is super light and fluffy, plus you save time by melting the butter in the dish instead of cutting it into the flour mixture!!!! 

Well, that's pretty much my week in a nutshell!! :D

What have you guys been up to?


Monday, June 11, 2012

Checking In

Morning everyone! I can't believe how long it has been since I last posted! I know that a couple of weeks ago I wrote about wanting to post only when I felt like I had something to actually talk about, and really, this past week, I was focusing on relaxing and hanging out with the family (we had a four day weekend!) and not on writing. Gotta say, it did feel nice to just "check out" for a bit and have fun.

Anyway, I have a couple of things that I do want to talk about today....so here we go!
First of all, over this past week, I have discovered the easiest chocolate dessert ever. It literally takes five minutes. It is called brigadeiro de colher, and is basically chocolate with the consistency of a dulce de leche! So, so good! :D Here's the recipe for ya:

Brigadeiro de Colher
\

Ingredients:
  • 1 can sweetened condensed milk
  • 2 heaping tablespoons sweetened cocoa powder (like for chocolate milk or something)
  • 1/2 tablespoon butter
Directions:
  1. Place all ingredients in a microwave-safe bowl. Stir to combine.
  2. Microwave for two minutes, checking to make sure it doesn't boil over. When time is done, take the bowl out and stir the ingredients for a little while to cool them down. Repeat once.
  3. Microwave for one minute. Remove bowl from microwave, stir again. The mixture should be fairly thick, and it will thicken more as it cools. Eat by itself or with vanilla wafers, fruit, etc!
If anyone tries this out, let me know what you think!!!!!

Now, I do want to talk a bit about something that I haven't brought up in a while....my workouts. I've really changed up my routine and have tried out some new workout styles. I still run and definitely still go to spin class, but I've also been incorporating more bodyrock type workouts.....more intense bodyweight circuit training. In the past couple of weeks, I have done more pushups than I thought I would ever do! :D hahaha I've definitely noticed an increase in strength, which is pretty cool. I'm still trying to find the right balance for me, personally. I noticed last week that I got a little burned out....I ended up taking Thursday off because I was just too tired to work out. So, my exercise routine is a work in progress, but it has definitely changed over the past few weeks. 

Soo, what did you do this weekend?
See ya'll later!


Friday, June 1, 2012

TV, Snacks, and Pizza

Morning everyone!!!! Happy Friday! :D

Not a whole lot has gone on since I last posted.....I did take the online SAT prep test and did ok, so I'm feeling a bit better about tomorrow. Other than that, I've been trying to enjoy my break from school....I can't believe that next year is my last year of high school!!! It will actually be a pretty great year, I think, especially because I'm only taking 4 classes instead of the usual 6, because a couple of years ago I took an extra class and only need four more credits. Also, I haven't decided on all the classes that I will take, but I think that the ones I have decided on will be really interesting!

So, a few days ago I saw a recipe for a healthy apple "crisp" snack and wanted to try to recreate it. I couldn't find the recipe again, so I ended up making up my own, and it was really good!
(you can't really see the oats in the pic....I had already sort of mixed everything in!)

Quick Apple "Crisp" (makes one large or two medium sized servings..I made two)

Also, this isn't quite a true crisp...more of a snack-y take on one!

Ingredients:
  • 1 medium apple, chopped (peel the apple if you prefer)
  • 2-4 teaspoons sugar (granulated or brown, to taste)
  • 1/4 teaspoon cinnamon 
  • 1-3 tablespoons oatmeal (depending on how "crisp-like" you want it to be)
Directions:
  1. Preheat your oven to 350. Lightly butter two ramekins, set aside.
  2. In a bowl, toss your chopped apple with the sugar and cinnamon, then divide the mixture equally between the ramekins.
  3. Sprinkle the oatmeal on top of the apple mixture.
  4. Bake for 15 minutes or until the apples are soft and the oatmeal has crisped up a little bit. 
This was really a good snack, especially since it was raining that day and I had one ramekin pre- and the other post-spin!!!

Also, tonight we're having a meeting here at home with some of our ministry team and I'm making Chicago-style pizza!! Whoo!! We all really like it and it has been a while since I made it, so I'm looking forward to that! Also, none of the ministry team has actually tried the pizza yet, so it will be fun!

Finally, since I am on holiday, I've been looking for some good tv to watch. 
What are some shows that you like????

Well, that's it for today....

What do you have going on this weekend?


Tuesday, May 29, 2012

Spring Rolls and SAT

Good morning! Hope everyone had a nice Memorial Day!

So last night, we had some leftover Chinese stir fries with fresh fried rice and....homemade spring rolls!! It was actually my very first time making them, but they turned out really well!!!! And the fact that I enjoyed eating them too was awesome...because they were fried; something that just a short while ago would have kept me from eating them! Anyway, I did get a pic, not a great one, but at least I'm remembering to take the pictures now! hahaha Here's the recipe:

Homemade Spring Rolls

Wrappers
Ingredients:
  • 1 cup flour
  • 1 egg
  • 2-4 tablespoons of water (start with 2 and add more 1 at a time if necessary...I needed 3)
Filling
Ingredients:
  • About 2 cups assorted chopped or diced veggies (I used a mixture of onion, bell pepper and carrot because that's what we had)
  • 2 tsp oil
  • soy sauce to taste
  • pepper to taste 
Directions:
  1. In a bowl, combine the flour, egg and 2 tablespoons of the water. The dough should not be too sticky, but should hold together when pressed, almost like a pasta dough. If it is too dry, add water one tablespoon at a time until it reaches the right consistency. 
  2. Split the dough into fourths. Roll out one of the fourths into a rectangle about 10 in long and 6 wide on a surface heavily dusted with cornstarch (don't use flour because it will get worked into the dough and make it thicker and tougher). The dough should be very thin. Cut the dough into 4 strips. Set aside onto a plate dusted with cornstarch and repeat with the remaining sections of dough. You will have 16 wrappers. 
  3. Make the filling by combining all of the ingredients in a small skillet and cooking over medium-low heat until softened. 
  4. Spoon a couple of teaspoons of the filling into each wrapper, topping with a thin slice of cheese if desired. Fold the long edges of the wrappers in to cover the filling and roll from the short end. To seal, brush a small amount of water on the end of the wrapper and finish rolling it. 
  5. Heat about 2 inches of oil in a pot or wok until the spring rolls sizzle as soon as they go in. Cook up to three at a time for about 2 minutes on each side or until they are golden. 
So there ya have it....homemade spring rolls!! I don't know how great my instructions are about the whole rolling process, so if you have any questions, just let me know! :D


Anyway, something else I've got going on is the SAT this Saturday. There's an American school here in Recife, and Saturday morning I'm going there to take the SAT again. I took it as a sophomore a couple of years ago when we were in the States, but I'm retaking it to see if I can do better than I did last time...especially on the math part. As a sophomore, there were a lot of math principles and formulas that I didn't know yet. So I'm curious as to how I'll do on the test.

Well, other than that, not too much going on around here....

Hope everyone has a nice day!


Monday, May 7, 2012

Where I've Been

Heeey everyone!!!! So I realize that I did not post at all last week....Tuesday was a holiday, so I wanted to hang out with the family, and the rest of the week I put into getting ready for tests this week! It is my last week of school!!! So I took some time off from blogging in order to get ready! What have you been up to in the past couple of weeks?


Besides school, not a whole lot has really been happening....another reason I didn't blog. I just really haven't had a whole lot of stuff to talk about....hahaha I'm so boring! :D I actually hadn't really baked anything until this morning! My sister and I did try out a new recipe yesterday (red velvet fudge! :D) and it turned out wonderfully!! I got the recipe for that off of another site but we modified it slightly so if ya'll want, I'll post the recipe!!!!  I'm going to share this morning's recipe with ya'll today....muffins! :D

Banana Lemon Muffins
makes 12


Ingredients:

  • 2 cups flour
  • 1 teaspoon baking soda
  • 1/2 teaspoon salt
  • 1/4 teaspoon cinnamon
  • 4 tablespoons butter, softened
  • 1/2 cup granulated sugar
  • 1/2 cup light brown sugar
  • 2 eggs, beaten
  • 3 medium ripe bananas, mashed
  • 1 teaspoon lemon zest
  • 1/3 cup milk
  • 1/2 teaspoon vanilla extract
Directions:
  1. Preheat your oven to 350. Combine flour, baking soda, salt and cinnamon in a medium sized bowl. Set aside.
  2. In a large bowl, cream together butter and sugars until fluffy. Add eggs, banana and lemon zest, stir to combine. Pour the butter/sugar/banana mixture into the flour mixture, stir gently. Pour the milk and vanilla into the mixture as well, stir until everything is combined.
  3. Divide batter between 12 greased muffin tins, bake for 25-30 minutes or until muffins test done with a toothpick. 
These muffins turned out pretty banana bread-like and the lemon isn't extremely strong, so if you want a more lemony muffin, feel free to add in some more zest!!! As is, the recipe is like a banana bread muffin with a slight lemony flavor to it!!!! 

Sooo I have some fun news....I am now on Instagram..finally! :D You can find me here. We actually just got wifi, so now I'm going to attempt to do a better job at taking pics....if not always for the blog, at least on instagram! :D 

Well, I gotta get studying...
What do you have going this week?

Monday, April 23, 2012

Apple Braid

Good morning!! How did your weekend go? Ours was nice....extremely quiet but very nice!

Last night, my sister and I decided to bake our version of this apple braid that I had seen a while back. We changed up a couple of things, and for some reason ours didn't stay braided, but everyone really liked it and we're definitely planning on making it again!!! :D Here's what we did:
Apple Braid
Ingredients:
For the apple filling:

  • 3-4 apples (3 medium or 4 small)
  • 4 tablespoons sugar
  • 2 teaspoons cinnamon
  • 2 teaspoons lemon juice
For the bread:
  • 2 1/2 cups flour, plus more for dusting
  • 1/3 cup sugar
  • 1 tablespoon instant yeast
  • 3/4 teaspoon salt
  • 1 cup warm water
  • 2 1/4 teaspoons oil
  • 1/2 teaspoon vanilla extract
For the glaze:
  • 1/3 cup sugar 
  • 3 tablespoons heavy cream
  • 3/4 teaspoon vanilla extract
  • pinch salt
Directions:
For the apples:
  1. Peel and core apples. Cut them into thin slices and then cut the slices in half. Toss with the sugar, cinnamon and lemon juice, place in a buttered dish and bake for 15 minutes at 350. 
For the bread:
  1. While the apples are baking, combine all of the dry ingredients for the bread in a large bowl. Stir in the water, oil and vanilla. Mix until smooth, adding more flour if dough seems too sticky. 
  2. Turn out onto a floured surface, knead a couple of times to make the dough smooth again. Roll out to a rectangle about 12 inches long and 6 inches wide. Transfer dough to a greased baking sheet.
  3. Using a sharp knife, cut strips 1 inch thick along both sides of the rectangle, leaving about 1/3 of the dough in the middle uncut. Spread the apples down the middle section of the dough. 
  4. To braid, fold strips of dough into the center, alternating sides. When you reach the end, pinch seams to seal. Bake at 350 for 25 minutes or until the bread is golden brown. For more information on how to braid the bread, click here.
For the glaze:

  1. While the bread is in the oven, make your glaze, by combining all of the ingredients in a small saucepan. Heat until simmering and cook until it thickens, about 2 minutes. If after 2 min, it still seems thin to you, add more sugar by the tablespoon, while cooking the mixture over low heat until the glaze is the right consistency for you. When the bread is done, brush the glaze over the top and serve! 

So there ya have it....our version of the apple braid!!!!! :D It was sooooo yummy!!!!! The apples tasted like pie filling and the bread was really awesome too!!! The main difference in our version was that we used a little more sugar than in the original, because our apples aren't too sweet and we also really like sweet stuff! :D Also, the glaze was completely different but that's only because I didn't happen to have any confectioner's sugar on hand so I had to make a warm glaze. It turned out nicely, though! 

Well, I'm hoping that my slice of apple braid this morning will fuel me through some school work.....only two more weeks left! whohoo!! What are you up to today????

See ya'll later! 

Monday, April 16, 2012

Easiest Biscuits Ever!

Morning! How's that for a creative post title??? I bet it comes as a complete surprise that today I'm going to share a biscuit recipe with ya'll....hahahaha! 

Anyway, before I do,my here's what went on this weekend. Saturday, my parents went on a mini (read: one day) vacation. It was my mom's surprise for my dad because their anniversary is in a few days. So, a friend of ours came and hung out with us for most of Saturday and yesterday. We had a lot of fun! My sister and I made churros with this recipe and they were awesome!!! We also made a chocolate dipping sauce to go with the churros! :D So fun! 

So, this morning, I was up pretty early and decided to try something that I've never really been great at baking...biscuits. For some reason, mine always are either too flat or they don't bake in the middle. Anyway, after some online searching, I found a recipe that looked awesome....plus a lot easier than most biscuit recipes that I had seen before. There actually isn't any butter in the biscuits...just some brushed on top before baking! Sooo here it is:
Easy, Yummy Biscuits
Ingredients:
  • 2 cups flour (plus some for dusting)
  • 1 tablespoon baking powder
  • 1/2 teaspoon salt
  • 1 tablespoon sugar 
  • 1 1/4 to 1 1/2 cups heavy cream
  • 2 tablespoons butter, melted
Directions:
  1. In a medium sized bowl, whisk together the flour, baking powder, salt and sugar. Gently fold in 1 1/4 cups of the heavy cream and add the remaining cream in by tablespoons just until the dough comes  together (I used about 3 tablespoons of the remaining 1/4 cup). Gently fold all the ingredients together, making sure not to overwork the dough. 
  2. Turn out onto a floured surface and pat out the dough until it is about 3/4 inch thick. Cut out rounds of dough and set on a buttered or lined baking sheet. Gather the dough scraps and make more rounds until all of the dough has been used up (I got about 9, but I cut my biscuits a little large...the recipe originally said 10-12). Brush the tops of the biscuits with the melted butter. 
  3. Bake at 425 for 12 to 15 minutes or until they are golden. Serve with butter, honey, jelly, etc! :D 
These were really great, and easy as well! 

Is there a recipe that you had trouble with when you first started baking? 
For me, biscuits are tough for some reason....I'm pretty sure that I always overwork the dough because I'm nervous about the ingredients not being incorporated enough...haha. :D Even these weren't perfect....I guess I just have to bake some more biscuits then! 

Well, I had better get going.....got school to do!

How was your weekend?

Monday, April 2, 2012

Good to be Back

Morning everyone!!!!!
How did ya'll's weekends go? Mine was pretty great! Yesterday we visited a new church and had a nice time meeting new people!
So I was a little bit absent from the blog world last week.....just been really busy with school and stuff...plus I actually didn't have any new recipes/workouts to share. Sometimes it helps me to have a little something like  that to get me going on a post and then I just sort of go off on tangents from there. :D
Anyway, I do happen to have a recipe for ya today...the world's easiest cake! It is plain though, so you can either frost it and serve as a dessert, or do what I did and leave it plain and serve with jelly, honey, butter, etc for breakfast! Anyway, I do want to warn you that the texture of this is not a traditional "cake" as it is actually a brazilian recipe and I got my basic recipe from here. Because of the condensed milk in the cake, it is almost like a flan consistency but with flour, if that makes any sense at all. Also, the batter is very thin.....I was pretty worried when I first put it in the oven, but it does bake nicely!

Condensed Milk Cake
Ingredients:

  • 1 can (14 oz) sweetened condensed milk
  • 2/3 cup + 3 T flour
  • 1/2 tablespoon baking powder
  • 1/2 teaspoon vanilla extract
  • 4 eggs 
  • 3 1/2 tablespoons butter, melted
Directions:
  1. Preheat your oven to 350. Butter a 9x9 baking pan, set aside. 
  2. In a large bowl, combine all the ingredients. Beat very well until there are no lumps in the batter and everything has been incorporated. 
  3. Pour batter (once it again, it should be runny!) into the prepared pan. Bake for 22-28 minutes or until the cake tests done with a toothpick. 
  4. Remove from oven, let cool. Top with powdered sugar, frosting, more condensed milk, jelly, butter, etc! :D 
This was a seriously easy cake to make! Like I said before, the texture is a little bit different, so for that reason I don't think I'll make this all the time, but for a treat every once in a while, it is nice! I even made a lemon curd this morning to go along with it (I woke up at 5:30 today for no reason and I bake when bored). It was actually my first time having lemon curd, and I loved it!!!! I'm already thinking about the other citrus flavors I could use in the recipe! :D 

Easter is less than a week away. It is such an important time of the year. Not only is it a time to spend with friends and family, for Christians, it is also a time to remember Christ's death for us and His resurrection .  
It is a special time, and  I am definitely looking forward to having some quiet family time later on this week. Do you have any Easter plans? 

Well, that's about  it for today......

What are you up to this week? 

Friday, March 23, 2012

Very Special Day

Morning!!
Today is a veeery special day in this house! It is my sister's birthday!!!!!! After school, she and her best friend are coming here for dinner and then the two of them, my mom and I will go to the premiere of The Hunger Games later on tonight! Then tomorrow, we're going to have a little bit of a family celebration! So, so excited!!!! :D

Well, in other news, I have a yummy breakfast recipe to share with you guys today! It is another coffee cake....this time with chocolate!

Chocolate Swirl Coffee Cake

Ingredients:
  • 3/4 cup sugar
  • 1/2 cup butter
  • 2 eggs
  • 1 1/2 cups flour
  • 2 teaspoons baking powder
  • 2/3 cup milk
  • 1/2 teaspoon vanilla extract
  • 1/2 cup cocoa powder
  • 3 T sugar (only if cocoa is unsweetened)
Directions:
  1. Preheat oven to 350. 
  2. In a large bowl, cream together butter and sugar until fluffy. Add eggs one at a time, beating after each addition. 
  3. In a medium bowl, combine flour and baking powder. In another bowl, combine milk and vanilla. 
  4. Add about 1/3 of the flour mixture to the butter/sugar mixture, then add about 1/3 of the milk to that. Continue alternating between adding flour and milk to the butter mixture until everything is incorporated. 
  5. Combine cocoa and sugar. In a greased 9x9x2 pan, pour about 1/3 of the batter. Sprinkle about 1/2 of the cocoa mixture on top of the batter. Spread another 1/3 of the batter on top, sprinkle on the rest of the cocoa, finish with the remaining batter. Bake for 25-30 minutes or until the cake tests done with a toothpick.
We all liked this cake because the cocoa isn't to sweet and balances out the cake very nicely. Also, the cake itself was very easy to assemble and was pretty, too! Gotta love cute food! :D 

I don't think that I've got too much going on today....school, spin and Hunger Games is pretty much it, I believe! SO glad that today is Friday!!! I'm definitely looking forward to the weekend! What do you have going on this weekend? Tomorrow we're going to watch the Memphis Grizzlies game here at home and celebrate my sister's birthday some more! Speaking of her birthday, check out what I made her (it was her idea originally) last night:
A homemade gummy!! I googled the recipe and combined a couple to make this! Anyone who knows my sister knows that she LOVES gummy anything, and so I made her one with her favorite fruit flavor (passion fruit)! It was actually super easy and took about 30 minutes start to finish, so if anyone wants to make gummies, let me know! :D

Well, that's about it for today....see ya'll later! 


Monday, March 19, 2012

Recipe Inspiration

Good morning! Hope you all had a great weekend!! We didn't do a whole lot, but still had a good time! What were you up to this weekend?


Sooo today i wanted to share with ya'll a recipe that
my mom and I made yesterday. My grandmother's chicken and dumplings (or dumplin's, as written in the family cookbook :D)!

That's the only recent-ish picture that I could find....she doesn't really looove cameras. :D 

Anyway, my grandmother has been making chicken and dumplings forever and they're pretty much one of my all time favorite comfort foods! When I was little, almost every time we went to her house, she'd have a big pot of dumplings, some biscuits, and some other stuff and we'd all fill our plates up and sit down at the table (which is actually in the kitchen at her house) and go to town. When I was really struggling with my eating disorder, sadly enough, this was one of the dishes that I had the most trouble eating while we were in the States. So, when my mom and I made it for the first time a couple of weeks ago, I was so proud that I could enjoy the food again! When we make it, everything is from scratch....even the broth, but if you don't have a whole lot of time, you can use store-bought and just add some shredded, cooked chicken to it. Here's the recipe for ya'll:

Homemade Chicken and Dumplings
(not my picture..:D)
Ingredients:
  • 8 cups chicken broth (more or less)
  • 1 whole chicken or 4 to 6 breasts plus 4 thighs
  • 2 3/4 cups flour (plus additional flour for kneading)
  • 4 tablespoons oil
  • 1 cup ice water
  • salt, pepper and poultry seasoning to taste
Directions:
  1. Boil the chicken in water seasoned with the salt, pepper and poultry seasoning for 1 1/2 to 2 hours (or until chicken is very tender). Remove chicken from pot, cut into pieces or shred,  set aside. Save broth for boiling dumplings. 
  2. Mix flour, oil and ice water in a large bowl, and work dough just until everything is incorporated. Take about half of the dough and roll out on a floured surface to "pretty thin" (my grandmother's words). Cut the dough into strips, and drop small chunks of strips into boiling broth. Repeat with the other half of the dough, stirring with a fork every once in a while to prevent sticking. Cook 35-40 minutes, stirring every so often, until the dumplings are tender. Turn stove to low heat and then off. Add diced or shredded chicken. 
And there ya have it....my grandomma's chicken and dumpling recipe!!! We had ours last night with some pasta.....it absorbed all the extra broth from the dumplings, almost as if the broth were a sauce, and was really tasty! Also, these are best when served with some sweet tea! hahahaha

What's a meal that is a sort of comfort food to you??? For me, chicken and dumplings and potato soup are some of my favorite comfort foods! :D Oh and anything chocolate as well. hahaha

Well, I should get studying...see ya'll later!

Monday, March 12, 2012

Chocolate Chip Cream Muffins

Good morning! How is everyone today????

I have never really liked Mondays very much......I mean who wants to go back to school/work after a nice, relaxing weekend? I know I don't! That's one of the reasons that I like to bake on Mondays......having something special for breakfast just puts me in a much better mood!
Something special like these muffins. Now I'm pretty sure that everyone who has ever had a muffin has either seen or eaten a chocolate chip muffin. Nothing new in that respect. However, I made these using my new favorite muffin base that I first tried out a couple of months ago with some mango cream muffins (recipe on the recipe page!). Before that, I had never baked muffins with cream in them......scones, yes, but not anything else. So, when I had some chocolate chips to use up, I decided to "wing it" and see if the cream base worked well with other muffin flavors. It did. :D

Chocolate Chip Cream Muffins
Ingredients:
  • 1 3/4 cups flour
  • 2 teaspoons baking powder
  • 1/2 teaspoon salt
  • 3/4 cup sugar
  • 8 tablespoons butter, melted or oil
  • 1/2 cup cream
  • 2 eggs
  • 1 teaspoon vanilla
  • about 1/2 to 3/4 cup chocolate chips....I just finished up a bag that we had opened already
Directions:
  1. Preheat your oven to 400 and grease 10 muffin tins.In a large bowl, combine flour, baking powder and salt. Set aside. 
  2. In another bowl, combine sugar, butter or oil, cream, eggs and vanilla. Stir until everything is combined. Add liquid ingredients to dry, mixing just until combined. Gently stir in the chocolate chips until they are more or less evenly distributed. 
  3. Spoon some of the batter into each of the tins, you will fill them about 2/3 of the way full. Bake for 20 minutes or until the muffins test done with a toothpick. 
  4. Serve with a glaze, butter or plain. Enjoy!!
As soon as my mom took a bite of these muffins she said that I had found one of the best muffin bases that she had ever had! So I'm thinking that I'll hold on to it! :D I've definitely got some more creative ideas floating around, but I wanted to see if the base would work with other ingredients before I got too crazy. 

So, in other news, my dad got home safely at about 1 AM Sunday morning. He was very tired but said that overall, he had a good trip. We were all glad that he was home......after having been gone for the better part of two weeks, it was really nice to spend all of yesterday hanging out! 

Recently, we got a box from some friends in the mail! Among other things, it had some movies in it! My mom, sister and I watched them all on Friday and Saturday, and last night, we rewatched one of them with my dad! We got The Help, Dolphin Tale and Midnight in Paris. I'm pretty sure that of the three, although we enjoyed them all, The Help and Dolphin Tale were our favorites. Both sad and sweet. We watched The Help with my dad last night and he enjoyed it as well. We're also already planning on watching the others with him soon!!!! Have you seen any good movies recently? If so, what were they? I loved the Help so much, that I've now got the book on my ereader!!! :D Already almost done, too!!!! I really think that they did a good job in adapting the book to the screenplay!!!! 

Well, that's about it for today....be back later on this week with some more fun stuff!! :D

Edited to add:
Musings of a Healthy Chocoholic just got a Twitter!!! Check it out: https://twitter.com/#!/GenniferDeLille


How was your weekend? 

Wednesday, March 7, 2012

Easy, Yummy Onion Rings

Good morning!! Hope everyone is doing well so far this week! My dad went out of town again yesterday, so now its just me, my mom, my sister and the cats here at home!  We'll all definitely miss dad, but we do have some girly stuff planned for the rest of the week!!! For instance, yesterday my Mom and I went up with some friends to the community and spent part of the afternoon hanging out with the ladies! So much fun! Then, for dinner, we had homemade pizzas and onion rings!!! I actually just perfected my onion ring recipe, so I thought I'd share it with ya'll:

Easy, Yummy Onion Rings (serves 3-4)
Ingredients:

  • 1 large onion, sliced into rings
  • 3/4 cup flour
  • 1/2 teaspoon baking powder
  • 1/2 teaspoon salt
  • dash of pepper
  • 1/4 teaspoon chili powder
  • dash seasoning salt
  • any other seasoning that you like, to taste! :D
  • 1 egg
  • 1/2 cup buttermilk
  • Oil, for frying
Directions:
  1. Slice your onion and place in water while you prep everything else. 
  2. In a medium container with a lid, combine your flour and seasonings. In a separate bowl, combine the egg and buttermilk. 
  3. Working with a few onion rings at a time, dip into buttermilk mixture, and then place in the flour. Close the container and shake it to coat the onion rings with the flour mixture. Then, dip back into buttermilk mixture and coat with flour again. 
  4. Repeat this process with all of the onion rings, placing the finished ones on a plate as you are going. 
  5. Heat about 1 inch of oil in a deep skillet until it is hot enough to start frying the onion rings as soon as they are placed in the skillet. Working in small batches, fry the onion rings for about 1-2 minutes each side or until golden brown. 
There ya have it!!! I really liked having the flour in a container with a lid because that way there was a whole lot less mess and it made the process go by faster as well!!! A cool thing about onion rings is that they aren't quite as greasy as french fries, for example, because the batter really soaks up excess oil very well. Also, we like our onion rings pretty well seasoned, so if you want to take anything out or even add in some different seasonings, tell me how it works out!!

So tonight is going to be a lot of fun!!!! There's a movie rental place just up the street from us and today is "cheap day", where movies cost about 2-3 reais each!!!! We're going to rent some chick flick and have a girl's night!! Any good chick flick recommendations??? We've seen a lot of movies, but it has been a while since we watched a real chick flick, so I'm excited!


Speaking of girl's night, if that's gonna happen, I need to get on the schoolwork! See ya later!!! :D

Favorite fried food????
Ummm french fries, onion rings, fried dill pickles, heck doughnuts.....basically fry anything and I'll eat it! :D

Monday, March 5, 2012

Computer Scare

Good morning!!! How are ya'll today???? What did you do this weekend?

My parents got in safely yesterday and we spent most of the afternoon just hanging out. However, late Saturday night I had a little bit of a computer scare. I was online, facebook I think, and all of a sudden my internet closed, the screen went black and a BUNCH of error messages popped up saying things like my C drive had crashed, my RAM wasn't functioning properly, etc. Then, a couple of minutes later this popped up:

I don't know if you can tell, put in the top left corner, beside where it says "system check", there is a windows symbol. Well, when it showed  up, I lost access to everything on the computer: files, programs, even the start menu went empty. So I thought initially that something with my computer really had gone wrong, and because the System Check window looked like a windows program, I clicked on fix errors. Well, I was immediately taken to a page where I was asked to pay upwards of 80 dollars just to fix my computer. After that, I began to get a little suspicious. So, I shut the laptop off for the night, and the next morning, turned it on to find the same system check window opened. I then got on the other computer and found out that the whole thing is a virus that manages to block all your computer's files, making it look like you have lost everything on it and really do have a problem. It even blocks you actual antivirus program, so your computer doesn't even register that you have a problem. With the version that hit my computer, you can't even get online because your internet browser is hidden as well. My sister and I managed to connect my computer and the other one via remote access and she sent me a freeware called TrojanKiller that restores hidden files. After that, I just rebooted the laptop and everything was back to normal. It was really scary though and for a while I truly thought that I had lost everything on my laptop. Here's some more info about this virus, because it seems that more and more people are being affected by it:
System Check can really screw up the computer system it gets into. It’s because the program is one of those fake optimization tools whose aim is to trick the user rather than provide some real help. It can infiltrate your PC in a number of ways all of which are backdoor, which means you don’t have many chances to actually notice and prevent this even. As soon as System Check is on board, it executes the programmed sequence of actions, adding new files and changing your registry by creating new entries in there as well. This done, it will get launched each time Windows loads up because one of those new registry values keeps telling your machine to run the malware’s random executable during startup. When running, System Check will kind of scan your computer for errors and, not surprisingly at all, will find lots of those. It triggers bogus alerts like “Failed to save all the components for the file \System32\00004823″, “A potential disk failure may cause loss of files, applications and documents stored on the hard disk”, “Hard drive clusters are partly damaged” etc. These notifications are all part of the general campaign targeting the formation of a wrong impression on the user’s end. In the end of the day, this program always offers you some assistance by stating that it can fix all of those critical errors if you buy its full version. Now, do not even purchase this scam application. The only thing it can ‘repair’ is the bunch of imaginary issues it had made up in the first place. So be wise and get rid of this badware. (source)

 I realize that I'm sort of going on about this, but it is really sad to me how people actually spend a lot of time working on stuff like this just to trick others into paying them significant amounts of money.....and that they're so good at what they do that they can even fool a real antivirus program.

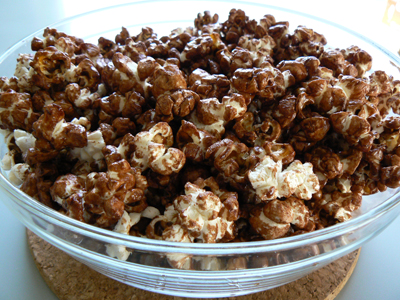
Anyway, if you stuck with me through all of that, you deserve a recipe! :D What I've got for ya today is some chocolate popcorn:
Chocolate Popcorn


Ingredients:

  • 1/3 cup popcorn kernels, unpopped
  • 1/4 cup plus 2 T sugar
  • 2 tablespoons corn syrup
  • 2 tablespoons cocoa powder
  • 1/4 cup butter
  • 1/2 teaspoon vanilla extract
Directions:
  1. Preheat oven to 250 degrees F and grease a cookie sheet.
  2. Pop the popcorn and set aside.
  3. In a medium saucepan, combine the sugar, corn syrup, cocoa and butter. Cook over medium-high until it comes to a boil. Continue boiling for about 2 minutes. Remove from heat. and stir in vanilla. Pour chocolate over the popcorn, stirring to coat all of it. Spread popcorn in an even layer on baking sheet.
  4. Bake for 30 minutes, stirring the popcorn every 10 minutes to prevent sticking and to make sure that all of the popcorn is coated. 
  5. Remove from oven, let cool. Break up any large clumps and store in an airtight container. 
Everyone really loves this popcorn! Easy and tasty!!!

Do you like sweet popcorn like caramel corn, or do you prefer salty versions??

That's about it for today...see ya'll later!!!!

Monday, February 27, 2012

A Different Kind of Week......

Good morning, everyone!!!! How was your weekend? Mine was good, but a little bit sad at the same time. My parents left (really, really early) this morning for the mission conference held at the "home base" for our mission agency here in Brazil. They'll be gone until Sunday,  so my sister and I will definitely miss them a LOT! We do have a friend staying with us, who we actually hadn't seen in a while,  so we're pretty excited to get to hang out with her some this week!

The poor cats are really confused....mom and dad left early, plus there is someone they have never seen before staying here. They are both super cuddly right now too....especially Katsa. She's "helping" me blog as we speak! :D Isn't she cute?


In other news, I made cookies this weekend!!!! They're cute and bite-sized and everything! :D Here's the recipe:
Chocolate Coconut Macaroon Cookie Sandwiches 
makes 15


Ingredients:
Cookies:

  • 60 grams powdered sugar
  • 30 grams dried coconut 
  • 1 egg white
  • 20 grams granulated sugar
Filling: (you'll only use about half of this filling, but it is really tasty so I'm giving you the full recipe :D)

  • 1/3 cup heavy cream
  • 3 oz chocolate, finely chopped (or sub 6 T cocoa +3 T oil)
  • 1-4 tablespoons sugar (depending on personal preference) 
  • 1 tablespoon butter
  • 1/2 teaspoon vanilla 
Directions:
  1. Toast the coconut in the microwave by first microwaving on high for about a minute, stirring and microwaving in 30 second increments until done. 
  2. Sift together the powdered sugar and the coconut into a small-medium bowl. Set aside.
  3. Beat the egg white in your mixer until foamy. Keep beating while slowly adding the granulated sugar to the white. Beat on high until stiff peaks form. 
  4. Fold about 1/4 of the egg white mixture into the coconut mixture. Keep folding in the rest of the egg white mixture until everything is combined. Your batter should be kind of thick but you should be able to pipe it out. 
  5. Pipe out 30 1/2 in circles onto a prepared baking sheet. Bake at 350 for 12-15 minutes or until macaroons are set. 
  6. While baking, prepare the filling. Combine the cream, chocolate and sugar in a pot. Heat over medium-low until the chocolate has melted and is smooth. Stir in the butter and the vanilla. 
  7. When the macaroons have cooled, gently remove from the baking sheet. Spread some of the filling on 15 of the macaroons, top with the other 15. 
So there ya have it! I love it when an experiment works out!!!! :D

I had better get studying.....see ya'll later!
Do you like experimenting in the kitchen or do you prefer to make tried and true recipes?